Mango and Passionfruit Bars Recipe
Introduction
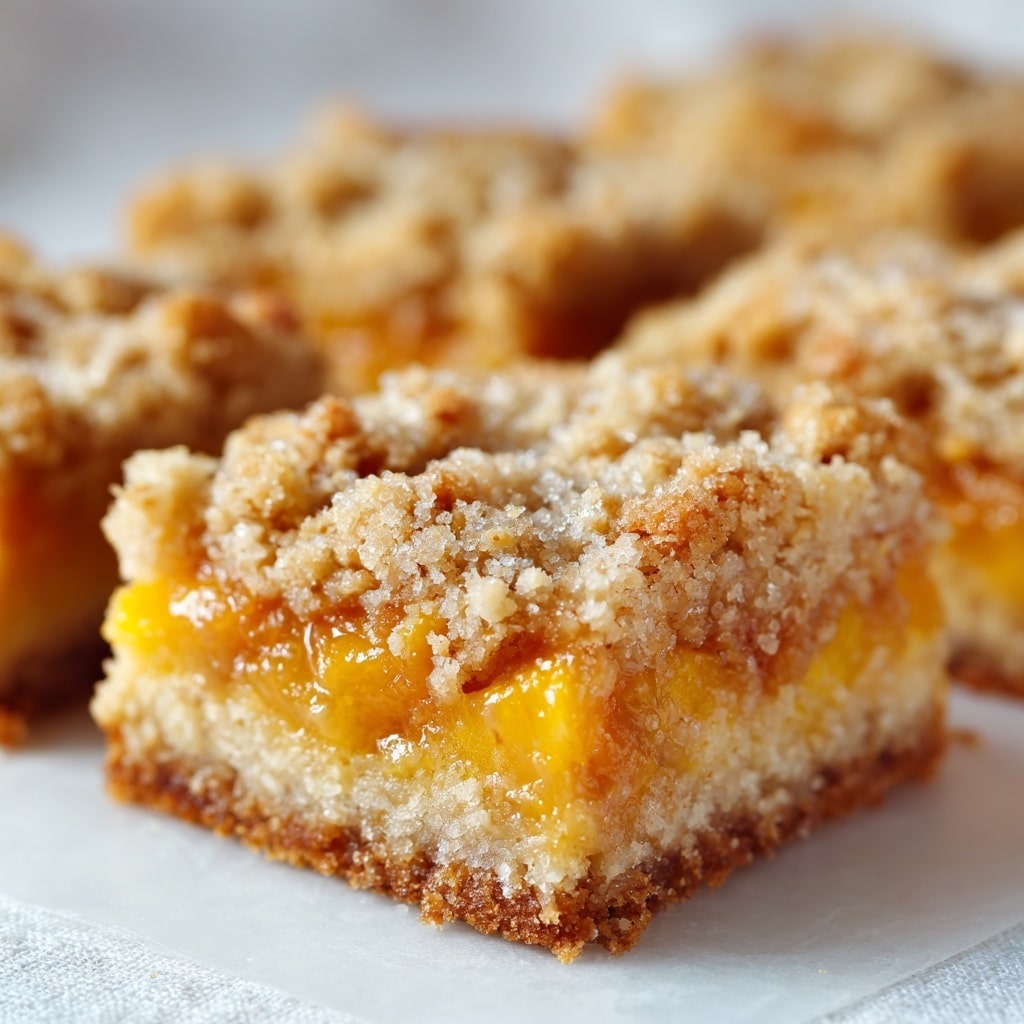
These Mango and Passionfruit Bars are a refreshing dairy-free treat that combines tropical flavors with a creamy, nutty base. Perfect for a light dessert or a sweet snack, they are both vibrant and satisfying.
Ingredients
- 1 cup (160g) roasted or raw almonds (hazelnuts, or any other nut/seed)
- 1/2 cup (100g) pitted dates (soaked in boiling water for 10 minutes)
- 2 cups (260g) raw cashews (soaked in boiling water for 10 minutes)
- 150g frozen or fresh mango chunks (approx 1 1/2 medium-size mangoes)
- 3/4 cup (170g) thick dairy-free yogurt (unsweetened)
- 1/3 cup (115g) maple syrup (or to taste)
- 1/3 cup (75g) melted cacao butter (or 115g melted vegan white chocolate)
- 1/4 cup (60g) lemon juice (lime juice or passionfruit pulp)
- 1 teaspoon vanilla extract (optional)
- Pinch of salt
- 200g frozen or fresh mango chunks (approx 2 medium-size mangoes)
- 1 1/2 tablespoons (14g) cornstarch / corn flour
- ~1/4 cup (65g) passionfruit pulp (approx 2 medium-size passionfruit)
- 2 tablespoons (30g) lemon juice (or lime juice, optional)
Instructions
- Step 1: Line an 8-inch (20cm) square cake pan or container with parchment paper, leaving some overhang for easy removal.
- Step 2: To make the base, add the nuts to a food processor and process until coarse crumbs form.
- Step 3: Drain the soaked dates, discard the water, then add the dates to the food processor. Process until fully broken down and the mixture sticks together when pinched.
- Step 4: Scoop the base mixture into the prepared pan and press firmly with a spoon or flat measuring cup to create an even base.
- Step 5: Drain the soaked cashews and discard the soaking liquid.
- Step 6: Add the cashews, mango chunks, dairy-free yogurt, maple syrup, melted cacao butter, lemon juice, vanilla extract, and salt to a high-speed blender. Blend until smooth and creamy. Adjust sweetness or acidity if needed.
- Step 7: Pour the filling over the base and smooth the surface with a spoon or spatula. Cover and refrigerate for at least 4 hours to set.
- Step 8: For the topping, puree the mango chunks using a blender or hand blender.
- Step 9: In a small saucepan, combine mango puree, passionfruit pulp, and cornstarch. Heat over medium heat, whisking continuously until thickened, then remove from heat.
- Step 10: Once the bars have set, spread the mango topping evenly on top. Refrigerate for at least 30 more minutes to set the topping.
- Step 11: Lift the bars out using the parchment paper. Cut into servings with a sharp knife. Enjoy immediately or store.
Tips & Variations
- Soaking nuts and dates softens them for easier blending and creates a smoother texture.
- Use vegan white chocolate instead of cacao butter for a sweeter filling.
- Passionfruit pulp can be replaced with extra lemon or lime juice if unavailable.
- For a nuttier base, try hazelnuts or walnuts instead of almonds.
- Sweeten the filling to taste by adjusting maple syrup depending on the ripeness of your mangoes.
Storage
Store these bars in an airtight container in the refrigerator for up to 5 days. They keep well because the cheesecake doesn’t melt in the fridge. For longer storage, freeze the bars for up to 1 month and thaw in the fridge before serving.
How to Serve
Serve this delicious recipe with your favorite sides.
FAQs
Can I use other nuts instead of almonds and cashews?
Yes, hazelnuts, walnuts, or even seeds like sunflower can be used. Soaking nuts softens them, so choose ones that blend well for a creamy texture.
Do I have to soak the dates and cashews?
Soaking helps soften the dates and cashews, making them easier to blend and improving the texture of the bars. If your blender is very powerful, you might skip soaking, but results may vary.
PrintMango and Passionfruit Bars Recipe

These Mango and Passionfruit Bars are a vibrant, dairy-free, and naturally sweet treat combining a crunchy nut base with a creamy cashew and mango filling, topped with a luscious tangy mango and passionfruit glaze. Perfectly balanced in flavor and texture, they’re a refreshing dessert or snack that sets firmly in the fridge without baking.
- Prep Time: 35 minutes
- Cook Time: 15 minutes
- Total Time: 5 hours 50 minutes
- Yield: 9 bars (cut into 3x3 grid) 1x
- Category: Dessert
- Method: No-Cook
- Cuisine: Fusion/Dairy-Free
- Diet: Vegan
Ingredients
Base
- 1 cup (160g) roasted or raw almonds (hazelnuts, or any other nut/seed)
- 1/2 cup (100g) pitted dates (soaked in boiling water for 10 minutes)
Filling
- 2 cups (260g) raw cashews (soaked in boiling water for 10 minutes)
- 150g frozen or fresh mango chunks (approx 1 1/2 medium-size mangoes)
- 3/4 cup (170g) thick dairy-free yogurt (unsweetened)
- 1/3 cup (115g) maple syrup (or to taste)
- 1/3 cup (75g) melted cacao butter (or 115g melted vegan white chocolate)
- 1/4 cup (60g) lemon juice (lime juice or passionfruit pulp)
- 1 teaspoon vanilla extract (optional)
- Pinch of salt
Fruity Topping
- 200g frozen or fresh mango chunks (approx 2 medium-size mangoes)
- 1 1/2 tablespoons (14g) cornstarch / corn flour
- ~1/4 cup (65g) passionfruit pulp (approx 2 medium-size passionfruit)
- 2 tablespoons (30g) lemon juice (or lime juice, optional)
Instructions
- Prepare the Pan: Line an 8-inch (20cm) square cake pan or container with parchment paper, leaving some overhang on the sides to make removing the bars easier later.
- Make the Base: Add the almonds (or chosen nuts) to a food processor and pulse until they form coarse crumbs. Drain the soaked dates and discard the water, then add the dates to the food processor and process until the mixture is combined into a sticky dough. It should hold together when pinched.
- Form the Base: Transfer the base mixture into the lined cake pan. Use a spoon or flat measuring cup to firmly press and spread it evenly to form a compact base layer.
- Prepare the Filling: Drain the soaked cashews and discard the water. Add the cashews, mango chunks, dairy-free yogurt, maple syrup, melted cacao butter (or vegan white chocolate), lemon juice, vanilla extract if using, and a pinch of salt to a high-speed blender. Blend until completely smooth and creamy, adjusting sweetness or acidity to taste.
- Assemble Filling: Pour the creamy filling over the pressed base in the pan, smoothing the top evenly with a spoon or spatula. Cover and refrigerate the pan for at least 4 hours to allow the filling to set.
- Make the Fruity Topping: Puree the mango chunks using a stand blender or hand blender until smooth. In a small saucepan, combine the mango puree, passionfruit pulp, and cornstarch. Heat over medium heat, whisking continuously until the mixture thickens. Remove from heat and let cool slightly.
- Top and Chill: Once the bars have set in the fridge, spread the mango and passionfruit topping evenly over the filling. Return to the fridge for at least 30 minutes to let the topping set further.
- Serve: Carefully lift the bars out of the pan using the parchment paper overhang. Use a sharp knife to cut into bars. Serve immediately or store in an airtight container in the fridge for up to 5 days, or freeze for up to 1 month.
Notes
- Soaking dates and cashews in boiling water softens them and ensures a smoother texture.
- Adjust the maple syrup amount according to your preference for sweetness.
- Cacao butter can be substituted with melted vegan white chocolate for a different flavor profile.
- Lemon juice can be replaced with lime juice or passionfruit pulp for varied zestiness.
- Use fresh or frozen mango chunks depending on availability; frozen mango should be thawed before use.
- The bars are no-bake and rely on chilling to set firmly.
- Store leftovers refrigerated to maintain texture and freshness.
Keywords: mango bars, passionfruit bars, vegan dessert, dairy-free cheesecake, no bake bars, fruit topping, cashew cream dessert