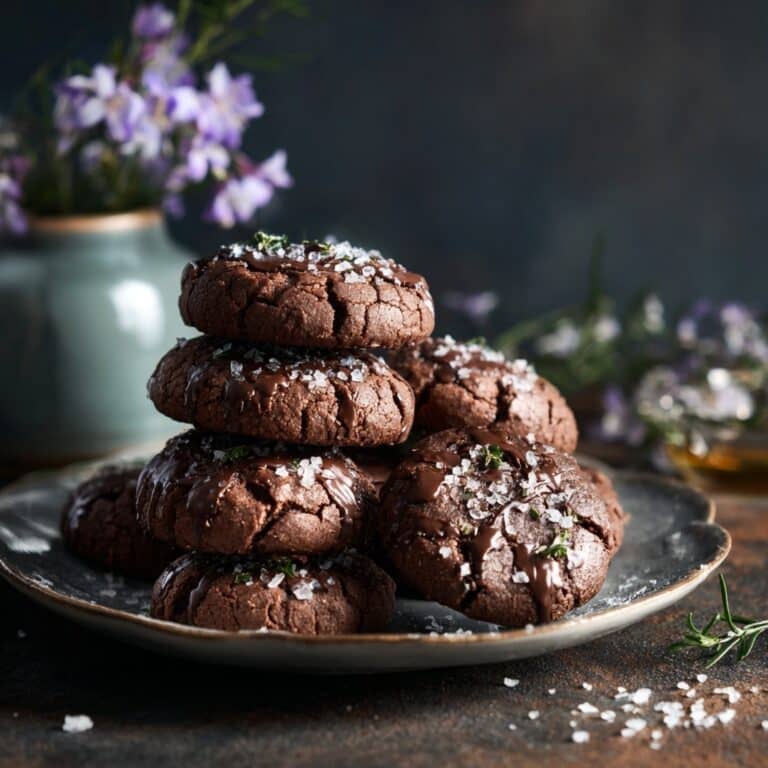
Chocolate Lava Cookies Recipe
Introduction
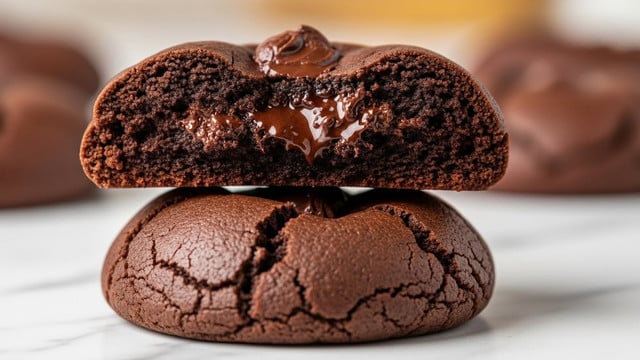
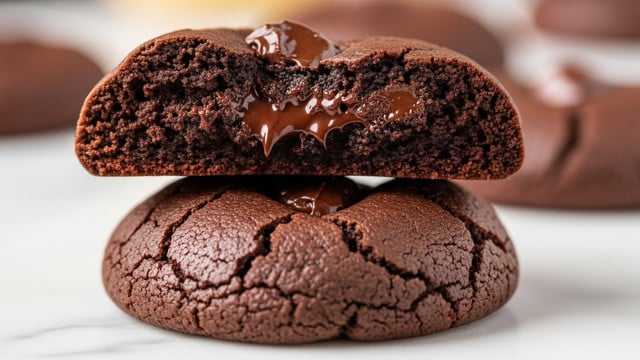
Chocolate lava cookies are a delightful treat combining the crispness of a cookie with a molten chocolate center. These gooey, rich bites are perfect for chocolate lovers looking for a fun twist on a classic dessert.
Ingredients
- 1 1/4 cup all purpose flour
- 1/4 cup cocoa powder
- 1 egg
- 1/2 cup unsalted butter, softened
- 1/2 teaspoon baking soda
- 1/2 cup light brown sugar, packed
- 1/4 cup granulated sugar
- 1 teaspoon vanilla extract
- 1/4 teaspoon salt
- 1/4 cup powdered sugar for dusting
Filling
- 200 gm dark chocolate, chopped
- 100 ml heavy cream
Instructions
- Step 1: Make the chocolate ganache by melting the chopped dark chocolate and heavy cream together in a double boiler. Once melted and smooth, refrigerate the ganache until it is set.
- Step 2: Scoop 2 teaspoons of the chilled ganache per cookie onto a lined baking sheet and freeze until firm.
- Step 3: In a mixing bowl, cream the softened butter with the granulated sugar and light brown sugar until the mixture is fluffy and pale.
- Step 4: Add the egg and vanilla extract to the creamed butter mixture. Whisk until fully combined.
- Step 5: In a separate bowl, whisk together the all purpose flour, baking soda, cocoa powder, and salt.
- Step 6: Gradually fold the dry ingredients into the wet ingredients until no streaks of flour remain.
- Step 7: Refrigerate the cookie dough for one hour to firm up.
- Step 8: Once chilled, scoop the dough into 1.5 tablespoon portions. Flatten each portion slightly, place a frozen ganache ball in the center, then carefully seal the dough around the ganache.
- Step 9: Place the stuffed cookies on a lined baking sheet and refrigerate again for 30 minutes.
- Step 10: Preheat the oven to 180°C (350°F). Arrange the cookies evenly on the baking sheet with space between them.
- Step 11: Bake for 10-12 minutes until the edges are set but the centers remain soft.
- Step 12: Remove from the oven and let the cookies cool on the baking sheet for a few minutes before transferring them to a wire rack to cool completely.
- Step 13: Once cooled, dust the cookies with powdered sugar before serving.
Tips & Variations
- For extra richness, use a high-quality dark chocolate for the ganache.
- You can substitute vanilla extract with almond extract for a different flavor profile.
- Chilling the dough and ganache thoroughly helps prevent the filling from leaking during baking.
- Add a pinch of espresso powder to the dry ingredients to intensify the chocolate flavor.
- Use a cookie scoop to ensure even-sized cookies for consistent baking.
Storage
Store baked chocolate lava cookies in an airtight container at room temperature for up to 3 days. For longer storage, keep them in the refrigerator for up to a week or freeze for up to 3 months. Reheat gently in a microwave for a few seconds to bring back the gooey center before serving.
How to Serve
Serve this delicious recipe with your favorite sides.
FAQs
Can I prepare the ganache ahead of time?
Yes, you can make the ganache a day in advance and keep it refrigerated. Just make sure to freeze it into portions before stuffing the cookies.
What if my ganache melts out during baking?
This usually happens if the ganache is too soft or the dough isn’t sealed tightly. Make sure the ganache is fully frozen and wrap the cookie dough around it securely to prevent leaks.
PrintChocolate Lava Cookies Recipe
These decadent chocolate lava cookies feature a rich, molten chocolate center encased in a soft, cocoa-infused cookie shell. With a homemade dark chocolate ganache filling that oozes out when bitten into, these cookies combine the best of fudgy brownies and classic chocolate cookies for an irresistible treat perfect for any chocolate lover.
- Prep Time: 30 minutes
- Cook Time: 12 minutes
- Total Time: 1 hour 45 minutes
- Yield: 12 cookies 1x
- Category: Dessert
- Method: Baking
- Cuisine: American
Ingredients
For the Cookie Dough
- 1 1/4 cup all purpose flour
- 1/4 cup cocoa powder
- 1 egg
- 1/2 cup unsalted butter, softened
- 1/2 teaspoon baking soda
- 1/2 cup light brown sugar, packed
- 1/4 cup granulated sugar
- 1 teaspoon vanilla extract
- 1/4 teaspoon salt
For the Ganache Filling
- 200 gm dark chocolate, chopped
- 100 ml heavy cream
For Finishing
- 1/4 cup powdered sugar for dusting
Instructions
- Prepare the Chocolate Ganache: In a double boiler, melt the chopped dark chocolate with the heavy cream, stirring continuously until fully smooth and combined. Transfer the ganache into a container and refrigerate until it sets firm, then scoop out 2 teaspoons of ganache per cookie and place them on a lined baking sheet. Freeze these scoops until ready to use.
- Make the Cookie Dough: In a mixing bowl, cream the softened butter with both the granulated sugar and light brown sugar until the mixture becomes fluffy and pale. Add the egg and vanilla extract, whisking continuously until the egg is fully incorporated.
- Combine Dry Ingredients: In a separate medium bowl, whisk together the all purpose flour, cocoa powder, baking soda, and salt until well blended.
- Mix Wet and Dry Ingredients: Gradually fold the dry ingredients into the wet mixture using a spatula, until there are no visible streaks of flour and the dough is uniform.
- Chill the Dough: Refrigerate the cookie dough for 1 hour to firm up, making it easier to handle.
- Assemble the Cookies: Once chilled, scoop 1.5 tablespoons of dough per cookie or use a medium cookie scoop to portion the dough. Flatten each dough scoop gently, place a frozen ganache ball in the center, then carefully seal the dough around the ganache to fully encase it.
- Chill Again: Place the stuffed cookie dough balls on a lined baking sheet and refrigerate again for 30 minutes to firm up further.
- Preheat Oven: Preheat your oven to 180°C (350°F).
- Bake the Cookies: Arrange the cookie dough balls on the lined baking sheet, spaced evenly to allow spreading. Bake in the preheated oven for 10-12 minutes, until the cookies are set but still soft in the center.
- Cool the Cookies: Remove from the oven and let the cookies cool on the baking sheet for a few minutes before transferring them to a wire rack to cool completely.
- Finish and Serve: Once fully cooled, dust the cookies generously with powdered sugar before serving to give them a beautiful, delicate finish.
Notes
- Use good quality dark chocolate with at least 60-70% cocoa for a rich, decadent ganache.
- Do not over-bake the cookies; they should be soft in the center to keep the molten lava effect.
- Freezing the ganache balls before stuffing helps prevent the chocolate from melting too quickly during baking.
- For easier handling, chilling the cookie dough is crucial before shaping and baking.
- Store baked cookies in an airtight container at room temperature for up to 3 days, or refrigerate for up to a week.
Keywords: chocolate lava cookies, molten chocolate cookies, chocolate ganache cookies, baked chocolate cookies, rich chocolate dessert