Oreo Sushi Rolls Recipe
Introduction
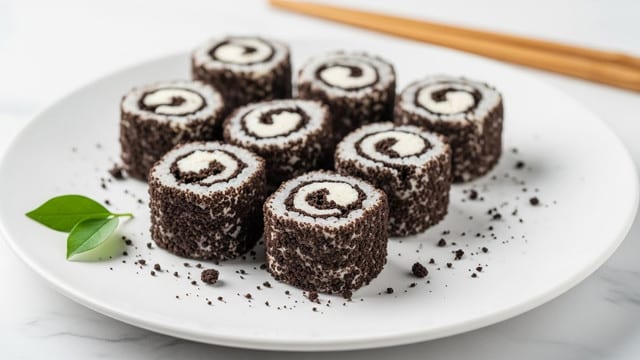
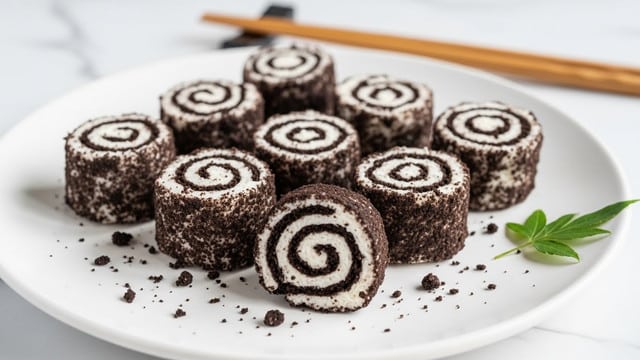
Oreo Sushi Rolls are a fun and creative twist on a classic treat, perfect for dessert lovers and kids alike. These no-bake sweet rolls combine crushed Oreos with creamy fillings and optional fruity additions to create bite-sized delights that look like sushi.
Ingredients
- 20 Oreo cookies (separated, filling reserved if using)
- 2 tablespoons milk or melted butter (to bind the cookie crumbs into dough)
- 2–3 tablespoons Oreo cream, cream cheese, Nutella, or peanut butter (for the filling)
- 1–2 strawberries or ½ banana, sliced thinly (for fruity variation)
- 1 tablespoon rainbow sprinkles or mini chocolate chips
Instructions
- Step 1: Separate the Oreos by twisting apart each cookie and scraping out the cream. Set the filling aside if you plan to reuse it.
- Step 2: Crush the cookie halves into fine crumbs using a food processor or by placing them in a zip-top bag and crushing with a rolling pin.
- Step 3: Combine the crushed cookies with 1–2 tablespoons of milk or melted butter until a pliable dough forms. It should be firm but not sticky.
- Step 4: Place the dough between two sheets of parchment paper and roll it out into a thin, even rectangle.
- Step 5: Spread your chosen filling—Oreo cream, Nutella, cream cheese, or peanut butter—evenly over the dough’s surface.
- Step 6: Add thin slices of strawberry or banana if using, then carefully roll the dough into a tight log, using the parchment to help guide it.
- Step 7: Chill the roll in the refrigerator for 30 to 60 minutes to firm up before slicing.
- Step 8: Using a sharp serrated knife, slice the roll into 1-inch pieces. Wipe the knife clean between cuts for neat slices.
- Step 9: Roll individual slices in rainbow sprinkles or mini chocolate chips to resemble sushi toppings.
Tips & Variations
- For creamier dough, use melted butter instead of milk. It adds richness and helps bind better.
- Try different fillings like peanut butter or flavored cream cheese for a twist in taste.
- Add fruit slices sparingly to avoid extra moisture that could make the dough soggy.
- Serve immediately after slicing for the best texture or keep chilled until ready to enjoy.
Storage
Store Oreo Sushi Rolls in an airtight container in the refrigerator for up to 3 days. When ready to serve, let them sit at room temperature for 5–10 minutes to soften slightly. Avoid freezing, as it can change the texture of the dough.
How to Serve
Serve this delicious recipe with your favorite sides.
FAQs
Can I use different cookies instead of Oreos?
Yes, you can substitute Oreo cookies with similar sandwich cookies or chocolate wafer cookies. Keep in mind the flavor will change according to the cookie used.
How do I prevent the roll from cracking when rolling?
Ensure the dough is pliable but not too dry. If cracks appear, gently press and smooth the dough with your hands or use a bit more melted butter or milk to soften it before rolling.
PrintOreo Sushi Rolls Recipe

These Oreo Sushi Rolls are a fun and creative dessert that transforms classic Oreo cookies into bite-sized sushi-inspired treats. Made by crushing Oreo cookies into a dough, spreading a creamy filling, rolling it up, and slicing into pieces, they are perfect for parties or an easy sweet snack with a playful twist.
- Prep Time: 15 minutes
- Cook Time: 0 minutes
- Total Time: 1 hour 15 minutes
- Yield: Approximately 20 sushi roll slices 1x
- Category: Dessert
- Method: No-Cook
- Cuisine: American
Ingredients
Oreo Base
- 20 Oreo cookies (separated, filling reserved if using)
- 2 tablespoons milk or melted butter (to bind the cookie crumbs into dough)
Filling
- 2–3 tablespoons Oreo cream, cream cheese, Nutella, or peanut butter (for the filling)
Fruit (Optional)
- 1–2 strawberries or ½ banana, sliced thinly (for fruity variation)
Toppings
- 1 tablespoon rainbow sprinkles or mini chocolate chips
Instructions
- Separate the Oreos: Twist apart the Oreo cookies carefully to separate the cookie halves from the creamy filling. Set the filling aside if you plan to reuse it for the filling layer.
- Crush the cookies: Place the cookie halves into a food processor or a sealed zip-top plastic bag. Crush them into fine crumbs either by pulsing in the processor or using a rolling pin to crush thoroughly.
- Form the dough: In a mixing bowl, combine the crushed cookie crumbs with 1 to 2 tablespoons of milk or melted butter. Mix well until the crumbs bind together into a pliable, dough-like consistency that is not sticky.
- Roll it out: Place the dough between two sheets of parchment paper to prevent sticking, then use a rolling pin to roll it out evenly into a thin rectangular sheet about ¼ inch thick.
- Spread the filling: Evenly spread 2 to 3 tablespoons of the reserved Oreo cream, or your choice of Nutella, cream cheese, or peanut butter over the entire surface of the rolled-out dough.
- Add fruit (optional): If using strawberries or banana slices, place them evenly on top of the filling layer to add a fruity twist to your sushi rolls.
- Roll it up: Starting from one edge, carefully roll the dough into a tight log using the parchment paper to help guide and prevent cracking.
- Chill: Wrap the rolled log in parchment or plastic wrap and refrigerate for 30 to 60 minutes until firm and easier to slice.
- Slice into sushi pieces: Using a sharp serrated knife, cut the chilled roll into roughly 1-inch thick slices. Clean the knife between cuts to maintain clean edges.
- Add toppings: Decorate the tops of the sushi rolls with rainbow sprinkles or mini chocolate chips to mimic the look of sushi roe and add a pop of color.
Notes
- The type of milk or melted butter used can affect the dough consistency, so add gradually to avoid making the mixture too wet.
- For a dairy-free or vegan option, use plant-based butter and milk substitutes, and select suitable fillings like vegan cream cheese or peanut butter.
- These sushi rolls can be stored in an airtight container in the refrigerator for up to 3 days.
- Feel free to experiment with different fillings and toppings to customize flavors and textures.
- Use a serrated knife for clean, neat slices and avoid pressing down too hard to prevent squishing the roll.
Keywords: Oreo sushi rolls, no bake dessert, Oreo recipe, fun dessert ideas, easy party treats, creative desserts